Exhaust
Better sound; more power. What's not to like?
This is not a HOWTO guide. It is a HOWI guide. In other words, it's not how to install your exhaust system. It's how I installed mine. I suggest not following these steps if you change your exhaust system, but maybe you can learn some lessons from my mistakes!
Disclaimer: Like I said, this is what I did. If you have problems, you should consult an automotive professional, not my Web page. Please don't rely on this narrative in place of a qualified mechanic!
Research
Owning a Mazda means coping with a smaller aftermarket than some other cars enjoy. There are a handful of exhaust systems available for the Protegé5, but a lot of them seemed to be on backorder or otherwise hard to procure when I was shopping for mine.
I read an article in Sport Compact Car about cat-back exhaust systems for the Toyota MR2. Their top choice was the Team Moon Exhaust (Note: Site seems to be gone). This system is built by Mazcare, a Mazda shop, so I thought the chances might be pretty good that they'd have a similar system for my Protegé5, so I gave them a call and found out they had one in the works!
Before
Please excuse the pitiful pictures. My photographic equipment leaves something to be desired.
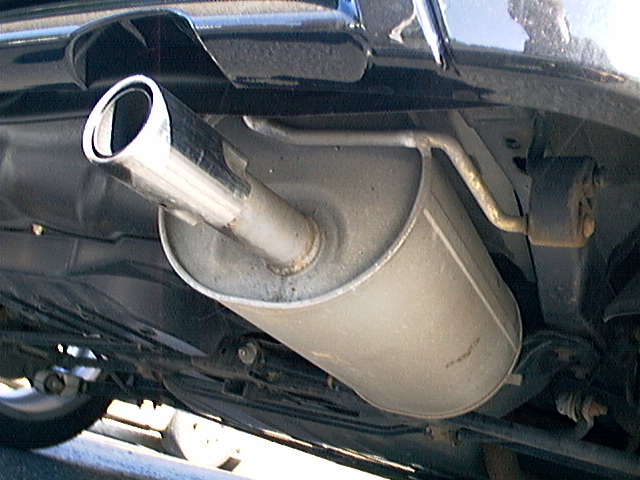 The stock exhaust system is OK. It comes with a nice, shiny muffler
tip and it sounds all nice and quiet. But the sound, appearance, and
performance can all be improved by upgrading the exhaust pipes and
muffler.
The stock exhaust system is OK. It comes with a nice, shiny muffler
tip and it sounds all nice and quiet. But the sound, appearance, and
performance can all be improved by upgrading the exhaust pipes and
muffler.
Mazda's exhaust system (from the catalytic converter back) is made up of two pieces. The first piece bolts onto the cat and includes the resonator. The second piece bolts on to the first piece and snakes up over the suspension, then back down to the muffler and exits at the rear of the vehicle. The Team Moon exhaust replaces both of these pieces with nicer ones. The pipes are a larger diameter and the muffler is less restrictive.
Off With the Old
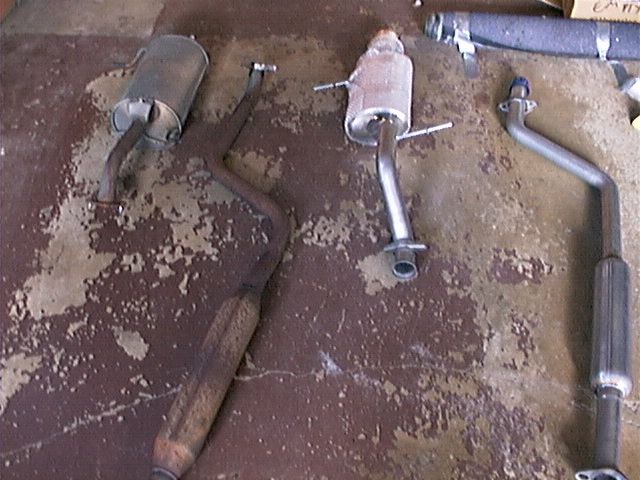
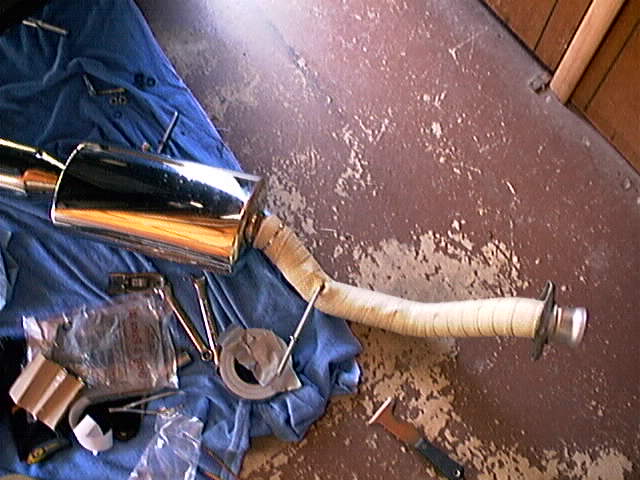
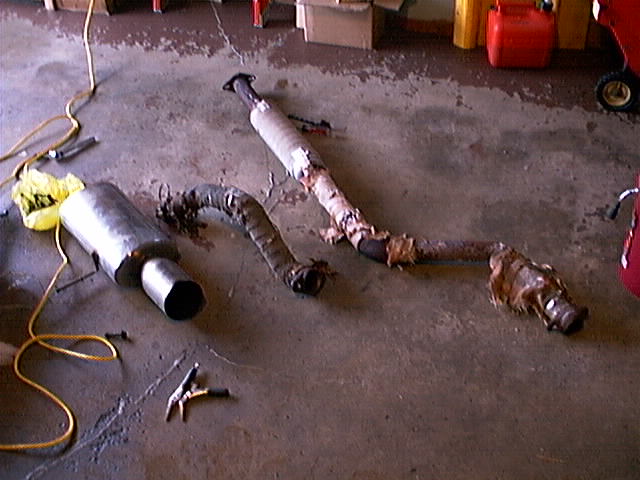
Click to embiggen
Here you can (sort of) see Mazda's exhaust system next to Team Moon's. It wasn't until after the project was over that I realized the chipped brown paint of my garage floor exactly matched the rust color of my original exhaust. Note that the Team Moon muffler is still in its bubble wrap to protect the snazzy finish.
Step 1 was to put the rear of the car up on ramps, since I don't have a lift or jackstands. This didn't leave much room under the car to work, so I had to squeeze my body underneath pretty tight.
Taking off the old exhaust was simply a matter of removing two sets of bolts: two bolts at the catalytic converter and two more where the pipes fit together. Since my car was a little over a year old at the time of this project, the bolts were slightly rusty, so they required a shot of WD-40, but they were pretty easy to remove.
Once everything was unbolted, the muffler's hangers needed to be removed from the rubber mounts. This, too, got a shot of WD-40 to help slip them out. Getting the muffler off took some tugging, but eventually it yielded to my might.
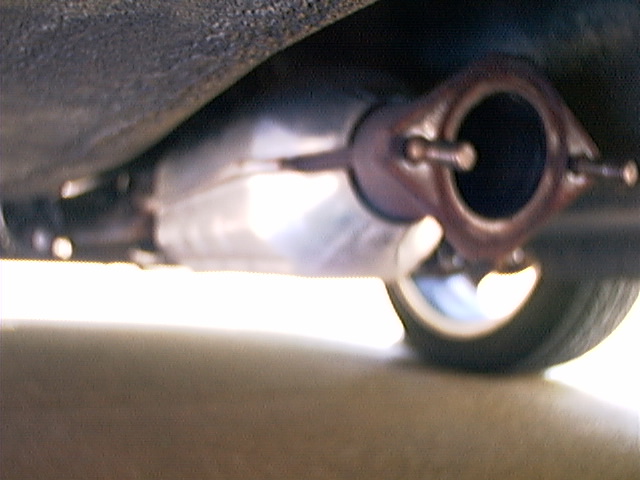 This yawning abyss is the
catalytic converter, which is just about under the front seats. The
bolts on either side are built in to the cat, and the new hardware
fits on it where the old bolts came off.
This yawning abyss is the
catalytic converter, which is just about under the front seats. The
bolts on either side are built in to the cat, and the new hardware
fits on it where the old bolts came off.
With the old system off, the next phase was to put the new system on!
Bumps in the Road
I ran into a few problems once the new system was on. Basically, the pipes were banging against the car's frame where the pipe swept over the suspension.
I tried a few things to solve the problem, including adding some washers to the muffler hangers to keep the spacing constant and wrapping the pipes in insulated tape to reduce the noise. The real solution, though, was to work with Charlie from Team Moon to adjust the fittment so that the pipes had adequate clearance everywhere.
Rather than detailing the process chronologically, I'll simply describe the final procedure I used to get a decent fit.
On With the New
Before I put the new pipes on, I wrapped them with DEI exhaust wrap. (Well, actually I put the pipes on without it, then took them off, wrapped them, and then put them back on.)
I guess the theory behind insulating your exhaust pipes is that if the exhaust gasses stay hot, they'll maintain their velocity as they exit the tailpipe, and that increases performance. I don't know if this is true or not. An interesting and not altogether unpleasant side-effect of the exhaust wrap is that once it heats up, it smells like pie.
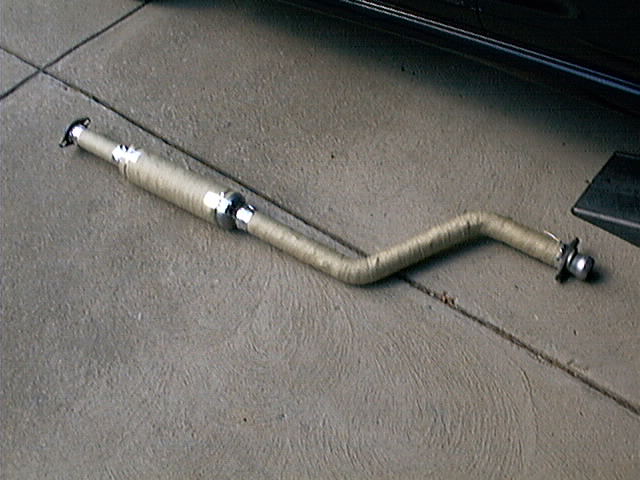
Here's what the pipes look like when they're wrapped:
DEI also sells metal cable ties that you can use to affix the wrap to your pipes, but I found that 3 inch hose clamps worked even better.
The Team Moon exhaust came with all the necessary hardware for installation, although that didn't amount to much -- basically some bolts, washers, nuts, and a gasket.
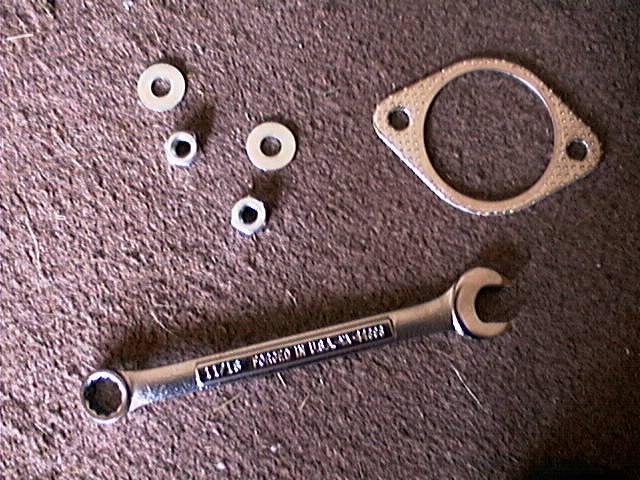
The gasket, shown above, fits onto the catalytic converter. Then, the first pipe goes on and gets held in place with the bolts and lock washers.
There are only two places where the exhuast system is fastened to the car. The catalytic converter is supported and so is the muffler, but everything in between is simply suspended between these two points.
So right now, there's a long, heavy pipe bolted on to the cat with nothing supporting it at the other end. Therefore, you need to hold up the end of the pipe that's furthest from the cat. I did this with the spare tire jack. This was good because it allowed me to adjust the height. The pipe travels along a channel in the underside of the car, and it's important that the pipe goes right down the center of this channel.
After the front pipe is in place, the rear section can be slipped into place. With it resting on the car's frame, you can slide the muffler hangers into their rubber mounts.
Then, you just bolt the front and rear sections together with the included bolts. While doing this, it's important to keep an eye on the exhaust tip to make sure it is centered in the rear bumper's arch. An assistant can hold it in place while the bolts get tighened. If you overtighten the bolts, the rear section of pipe will clamp down against the frame (and the exhaust system will clang as you drive). At the same time, the muffler tip will push up against the bumper (and your plastic will melt).
The last step is to remove the jack supporting the center section of pipe and make sure everything is still in place. That's it! The new system is on.
Click to embiggen
Miscellany
A few finishing touches: I smeared anti-sieze grease on all the bolts and hose clamps to keep them from rusting, and I put thread locker on the four bolts to keep them from vibrating loose.
 The last thing to do was to add the (included) Team Moon sticker to my
stickerboard (lower right corner).
The last thing to do was to add the (included) Team Moon sticker to my
stickerboard (lower right corner).
Results
Overall, I am pleased with the results of this modification. The dyno graph over at Team Moon's Web site shows a performance increase over most of the powerband, but it is difficult to notice this from the driver's seat. It does seem like power comes on a little quicker after shifting gears, though I don't know why this should be.
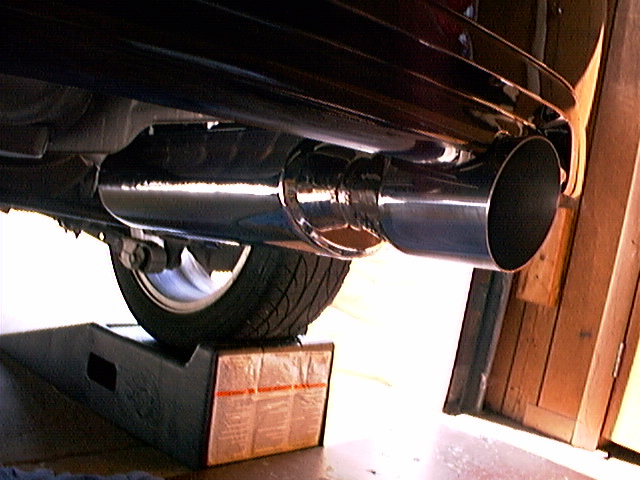
The appearance is somewhat sportier, although the exhaust tip is absurdly large. I suppose the tip diameter was chosen for performance reasons, and it doesn't look too bad. I just think it could be a little more subtle.
The car doesn't sound much louder at idle or low RPMs, but with a little more throttle, the engine is louder and has a pleasing, low exhaust note (unlike some imports with modded exhausts, which sound like somebody stepped on a beehive). There's kind of an annoying resonance in the neighborhood of 3250 RPM, but this can be cured by increasing the volume on the Buddy Holly CD.
Postscript
I got the exhaust hangers from Kartboy. They are stiffer than the stock hangers from Mazda, and they don't let the exhaust move around as much. There are four gangers in the set. The two with 10mm holes go up front, near the catalytic converter. The two with 12mm holes go at the rear, on the muffler.
Requiem
Well my performance exhaust has rusted to dust. I put the stock system back on. The Team Moon web site appears to be gone, so I can't even send them an email about it. Here are the stats:
- Installed: September, 2002; 18,000 miles
- Removed: March, 2006; 74,500 miles
- Total Lifetime: 42 months; 56,400 miles
Click to embiggen
The small piece in the middle of that photo used to be welded to the muffler, until it rusted off this weekend. Note the condition of the DEI mummy wrap. The muffler is stainless steel, so it is still in good shape. It may see action in the future.

