1999 Suzuki Savage Carburetor
"Life seems so much simpiler when you're fixing things. I'm good at fixing things." -- Anakin Skywalker
Introductory Remarks
While troubleshooting a performance problem on my 1999 Suzuki Savage, I decided to take apart and clean the carburetor. The problem turned out to be elsewhere, but while I had everything apart, I decided to take some pictures for future reference.
The numbers you see on the photographs correspond (I hope) to the drawing numbers on the microfiche that you can find at Temecula Motor Sports or Ron Ayers. I gather these are official diagrams distributed by Suzuki, as they appear to be identical.
Disclaimers: I may have mis-identified some of the parts. (If you notice any goofs, email savage (at) thinkythings (dot) org.) Also, you probably shouldn't try this yourself unless you're sure you know what you're doing. Carburetors are complicated and contain sensitive parts. It's easy to break something. If you have problems, you should probably consult a motorcycle mechanic. I almost certainly can't help you, and I'm providing these pictures only to document what I did, not as a guide for what you should do.
List of All Components
Part numbers (from the aforementioned diagram):
		1       .SPRING
		2       .DIAPHRAGM ASSY
		3       .PLATE
		4       .SCREW
		5       .LOCK WASHER
		6       .RING
		7       E RING
		8       .WASHER
		9       .SPRING
		10      NEEDLE, JET (5C39)
		11      .JET, NEEDLE (X-7M)
		12      .JET, PILOT AIR (45)
		13      COVER
		14      CLAMP (L:95)
		15      SCREW, CLAMP
		16      .JET, MAIN (145)
		17-1    .WASHER
		17-2    .WASHER
		18      .JET, PILOT (52.5)
		19      .VALVE ASSY, NEEDLE
		20      .FILTER
		21      .O RING
		22      .PLATE
		23      .SCREW
		24      FLOAT
		25      .PIN, FLOAT
		26      .GASKET
		27      SCREW
		28      .SCREW, DRAIN
		29      .PLUNGER ASSY
		30      .COVER
		31-1    .SPRING
		31-2    .SPRING
		32      .DIAPHRAGM ASSY
		33      SCREW
		34-1    .ADJUSTER
		34-2    .ADJUSTER
		35      .SPRING
		36      .BRACKET
		37      SCREW, CLAMP
		38      .HOSE ASSY
		39      HOSE (L:600->200)
		40      .JET, PILOT AIR NO.2 (230)
		41      .SCREW, PILOT (1,1/8)
		42      .SPRING
		43      .WASHER
		44      .O RING
		45      .PLUG
The carburetor is located between the air intake and the engine. It's the thing with the most hoses connected to it. Some of the carb is hidden by the gas tank.

Click to embiggen
Accessing the carburetor involves taking off the seat, then disconnecting all the cables and hoses. With persistence, it is possible to remove the carb without taking off the fuel tank; however, I found it was necessary to remove the fuel valve in order to be able to lift the tank a bit. This implies draining the tank by setting the value to "prime" and putting the fuel line into a suitable container.

Click to embiggen
It takes a lot of twisting and pulling to get the carb out of its position. Once it is out, it will continue to dribble gasoline.

Click to embiggen
- 13 - COVER
- 29 - .PLUNGER ASSY
- 38 - .HOSE ASSY
- 39 - HOSE (L:600->200)
Click to embiggen
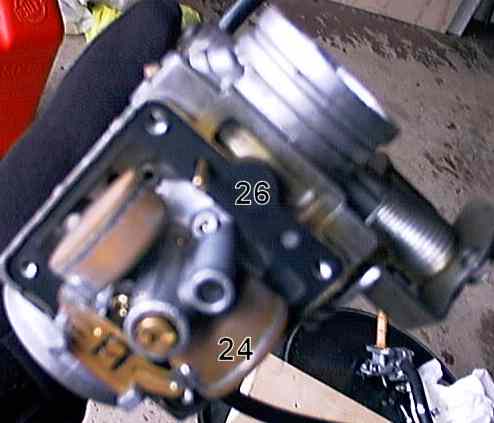
- 24 - FLOAT
- 26 - .GASKET
Click to embiggen
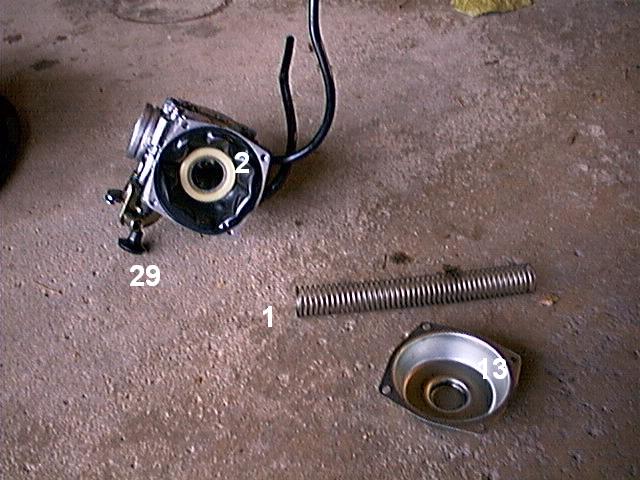
- 1 - .SPRING
- 2 - .DIAPHRAGM ASSY
- 13 - COVER
- 29 - .PLUNGER ASSY
Click to embiggen
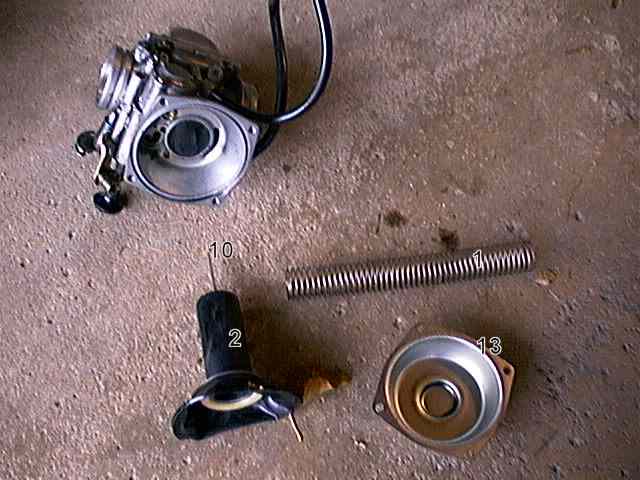
- 1 - .SPRING
- 2 - .DIAPHRAGM ASSY
- 10 - NEEDLE, JET (5C39)
- 13 - COVER

Click to embiggen
Click to embiggen
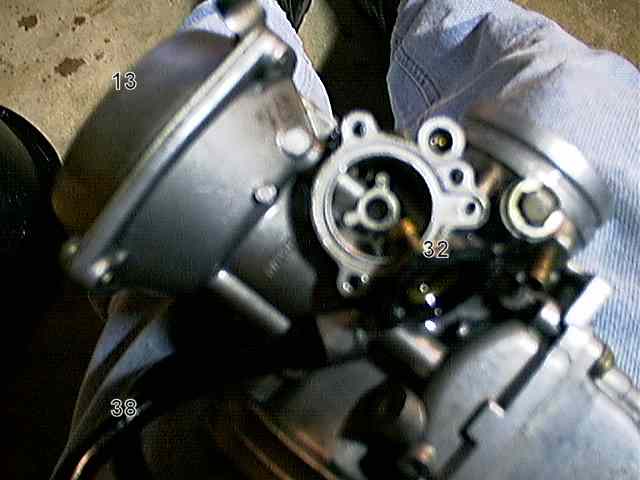
- 13 - COVER
- 32 - .DIAPHRAGM ASSY
- 38 - .HOSE ASSY

Click to embiggen
- 30 - .COVER
- 31 - .SPRING
- 32 - .DIAPHRAGM ASSY
- 33 - SCREW
That's it!

