Plugs and Distributor
1993 Protegé DX Spark Plug, Distributor, and Wire Replacement
This is Page 3 of 4
This is not a HOWTO guide. It is a HOWI guide. In other words, it's not how to replace your plugs, distributor, and wires. It's how I installed mine.
Disclaimer: Although this page includes a certain amount of advice, it is not intended to supplant manufacturer's instructions or actual mechanical expertise. If you have problems, you should consult an automotive professional, not my Web page. Please don't rely on this narrative in place of a qualified mechanic!
The procedure shown here is specific to a 1993 Mazda Protegé DX (SOHC). If you have some other kind of car, the procedure will be different, but probably not too different, especially if you've got an in-line 4 cylinder engine.
Removing the old stuff
Safety first! It's probably wise to disconnect the battery before working on the electrical system, but I didn't bother. I didn't experience any electrocutions or other problems.
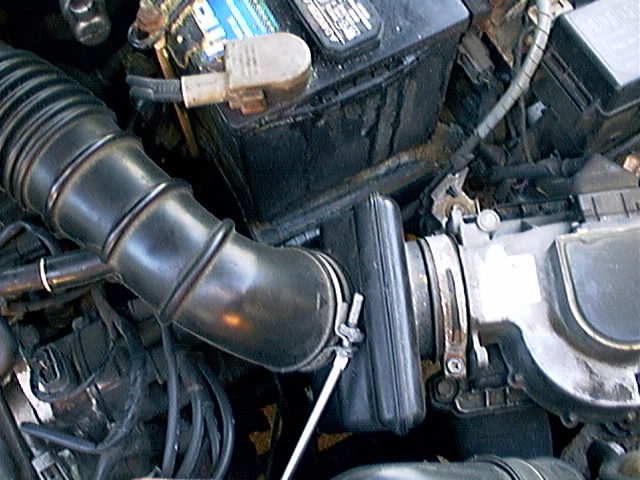
I began by removing the air intake ductwork from the air filter to the throttle body. This is necessary to effectively reach the distributor.
There are basically three hose clamps to remove: one at the throttle, one just above the air filter, and one on a small hose that goes from the intake hose to the valve cover.
Click to embiggen
Although it is not shown here, I took advantage of the absent air ducts and replaced the air filter.
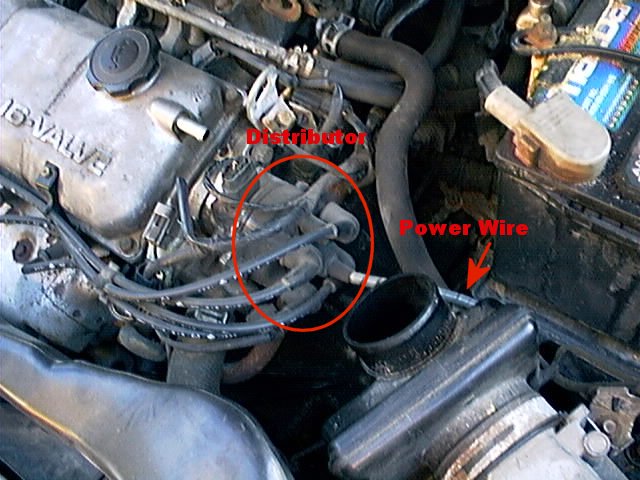
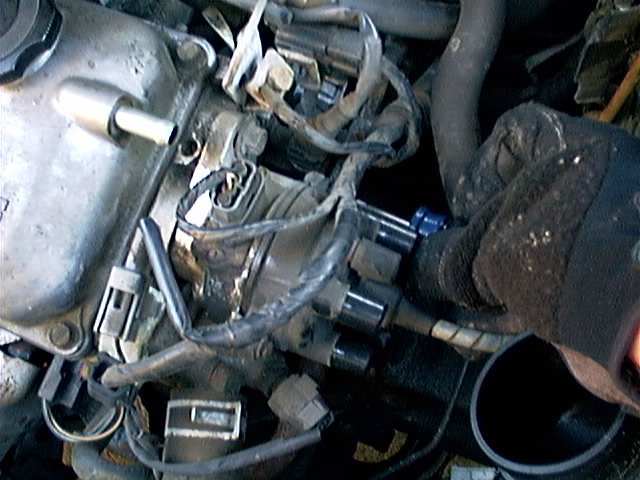
Once the intake pieces are out of the way, it is easy to access the distributor and the wire that provides power to it.
Click to embiggen
Before removing the distributor, I took off the Spark Plug Boots. These come off just by pulling. In general, it's best to pull the boot and not the wire, because pulling on the wire can cause damage. However, since I am installing new wires instead of saving the old ones, I am free to be as abusive as I want when removing the old wires!

Click to embiggen
On the other end, the wires also just pull off the distributor.
It is important to know which terminal on the distributor is wired to which cylinder. If the firing order gets messed up, the car won't run (or it will run very poorly). Therefore, it is smart to make a note of how the terminals on the rotor are numbered.
|
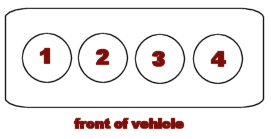
The engine's cylinders are numbered 1-4 from left to right, and each cylinder's spark plug needs to be wired to the similarly-numbered terminal on the distributor cap. |
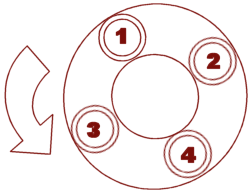
| The distributor rotates counter-clockwise. The terminals are numbered as shown in this schematic. Naturally, this produces a firing order of 1-3-4-2. |
|
Here are the old wires: four plug wires plus one main power wire.
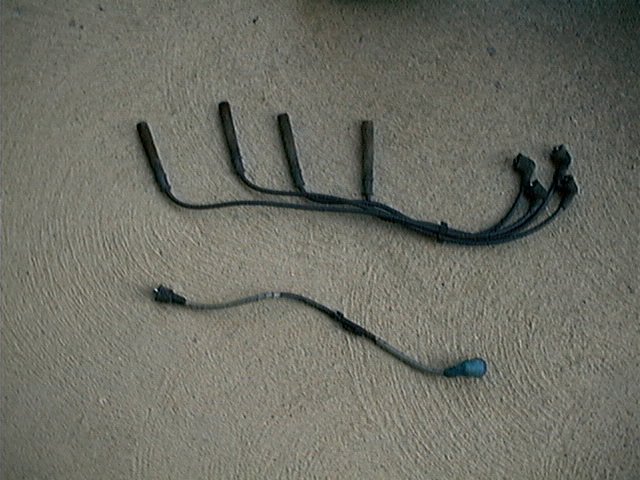
Click to embiggen
The wires are different lengths, and that fact will be important when it is time to put the new ones on.
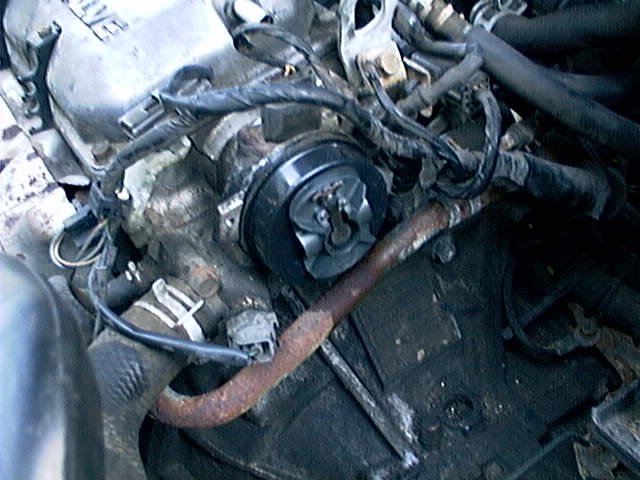
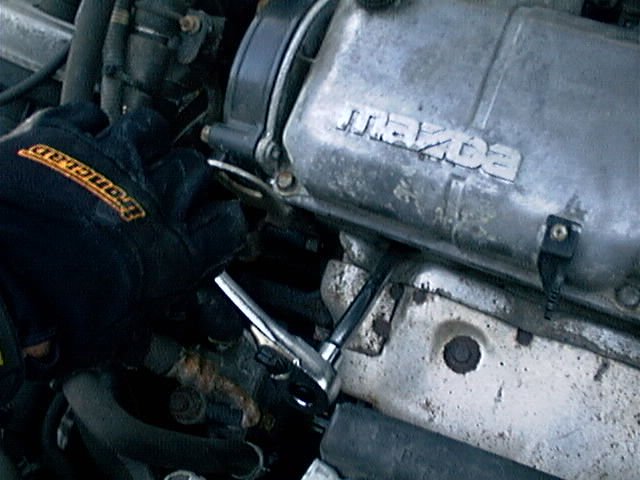
The distributor is held on by two hex-head screws. I tried a screwdriver, but the heads were pretty rusty, so I used a 7mm socket on them. WD-40 is my friend.
Click to embiggen
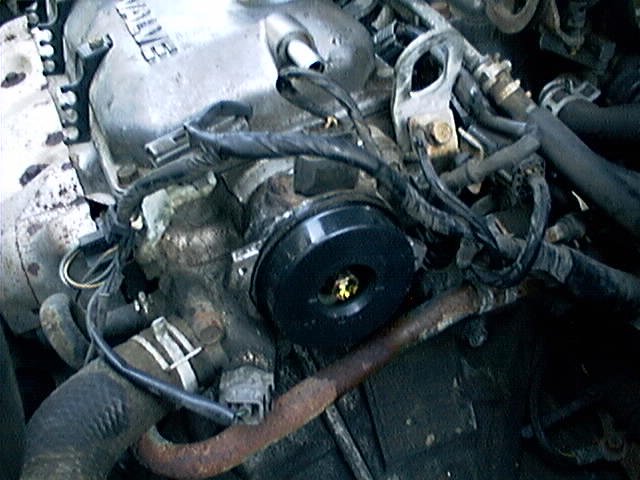
With the distributor cap off, you can see the rotor. It is a good idea to make a note of the approximate orientation of the rotor, because the new one might snap on in more than one orientation. It is important that the new rotor gets back on in the same position that the old one was on, because if it doesn't, then the firing order will be messed up, which will cause problems.
Click to embiggen
The rotor just pops off.
Click to embiggen
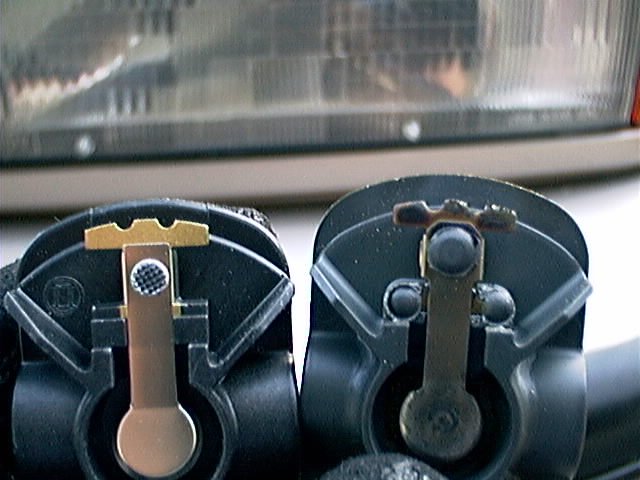
Here's a picture of the old rotor on the right and the new one on the left. The new one is significantly less cruddy.
Click to embiggen
The last step of disassembly is to remove the old plugs. This is done with a spark plug socket, which is basically a 5/8 inch deep socket with a rubber ring inside. I also used an extension on the wrench so that I was able to reach all the way into the spark plug hole.
Click to embiggen
It's a good idea to be real careful at this point. Breaking off a spark plug in the engine is bad, and stripping the spark plug threads will make it impossible to get a new one in there. If you need to take your car to a mechanic to fix either of these goofs, then this simple, cheap job becomes an expensive nightmare.
So use gentle pressure on the wrench when unscrewing the plugs. Stop if you feel resistance.
Only remove spark plugs from an engine that is completely cooled! The plugs stay hot after the engine seems cool, and you can burn yourself pretty easily. Furthermore, you don't want your engine block cooling (and slightly shrinking) while you're torquing the old plugs out or screwing new ones in.
Also, while your plugs are out of the block, each hole is a direct shot into a cylinder. You don't want anything to fall in there. Dirt and grease are bad. Screws, pebbles, or other hard objects will cause serious problems. And if more than a tiny amount of fluid gets in there, it could be fatal for your engine.
Therefore, it is wise to wipe out as much junk as possible from the spark plug holes before removing the plugs. And for goodness sake, plug the holes with a shop rag if you don't intend to put the new ones in right away!

